When I decided to again pickup an analogue camera one important question was raised, how to print and share worthy frames. The laundry developing of B&W negatives proved to be easier than I remembered but printing and sharing still needed to be worked out. I decided on a hybrid approach as there was no possibility of a darkroom. I would scan and that way insert them into my already digital work flow. How proved to be an easy answer as I have already started digitizing old film prints using my DSLR, see this post although now I have updated the hardware used, the method is the same. The idea is the same, just adapted for film, below is a brief description of how I currently do it.
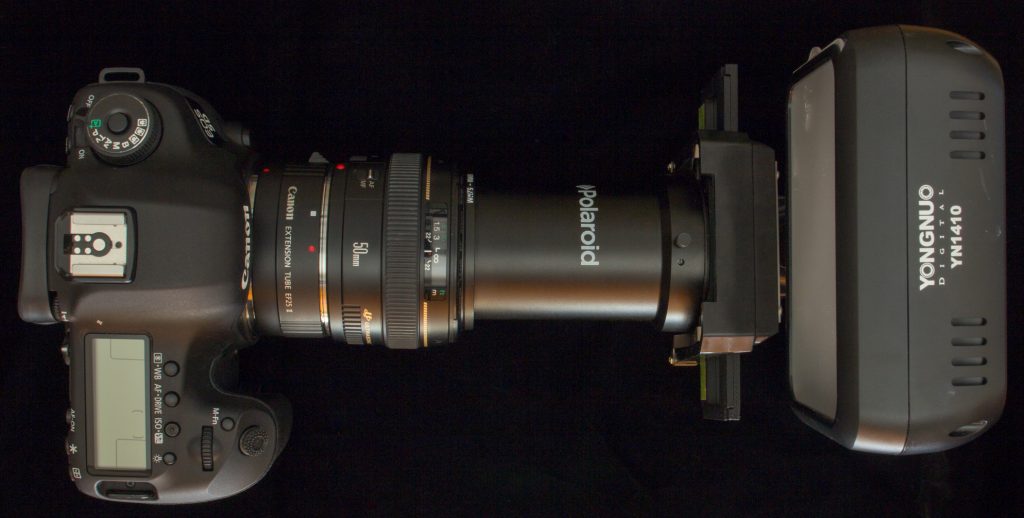
Camera I use is the EOS 5D Mark III Body and I power the body with a LP-E6 Dummy Battery DR-E6 DC Coupler for Canon 5D Mark III. The Canon EF 50mm f/1.4 USM lens attached and added between the lens & camera is the Canon Extension Tube EF 25II, this reduces the focusing distance to between 200 & 220mm which is within the working range I need.
Attached to the lens is the Polaroid HD Slide Duplicator With Macro Lens Capability For SLR Cameras and into that I use the 35 mm film holder/adapter made for Polaroid/Bowers HD Slide Duplicator . I had a similar one made that exposed three(3) frames allowing me to scan with less handling of the negatives, speeds up the process as well. A Youngnuo YN1410 is used to illuminate the negatives and I use a plug pack to save on batteries.
The 5D3 is tethered to a laptop and I use the Canon EOS Utility 3, this allows me to use Remote Shooting. The Remote Shooting software gives you full control over the camera’s settings allowing for quick changes between negatives as required. I shoot in manual mode, Auto White Balance, RAW, ISO 100 and save the shot images to Computer only. This allows me to save the images to a folder on the laptop I then setup Lightroom to Auto Import from that folder, applying a B&W Reverse Tone Curve to fix up the fact that I’m shooting negatives. This then gives me a very quick work flow from B&W negative to scanned B&W image in Lightroom. From there I treat it as I would any other image imported into Lightroom.
Below is an image of the setup.
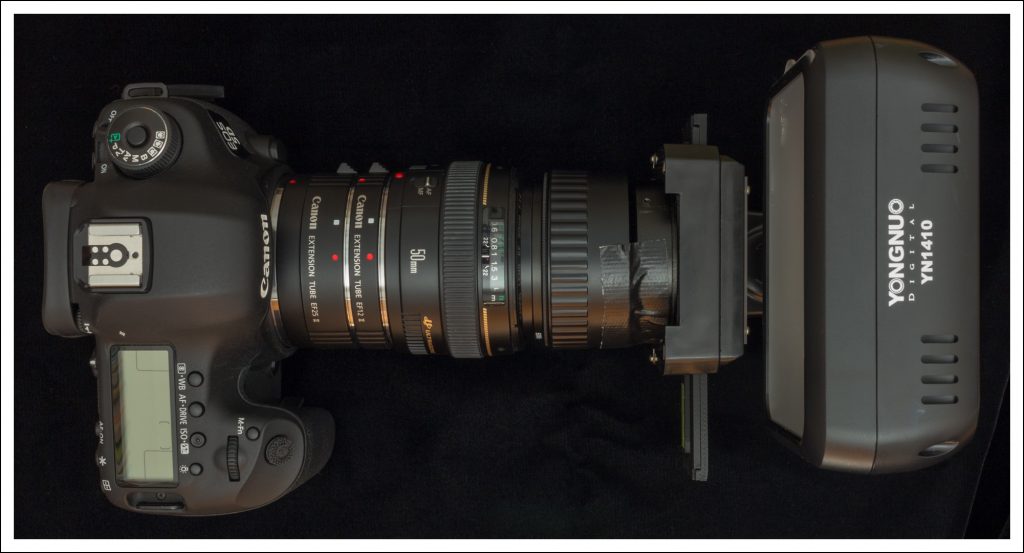
After some work with the above & an email for Don Komarechka answering a question I put to him about his method of film scanning, I was unhappy with the amount of digital frame I was wasting only using about 40%. So inspired by Don attitude more than his setup I set out to improve mine.
Its basically the same with a few changes, I have added another Extension tube this time the EF12. doing that changed the working distance from the lens to the film so I modified an old cheep plastic extension tube to the correct length & taped the 35mm holder to the end. I now get about 80% frame usage, double with a little effort.
Below is an image of my setup.
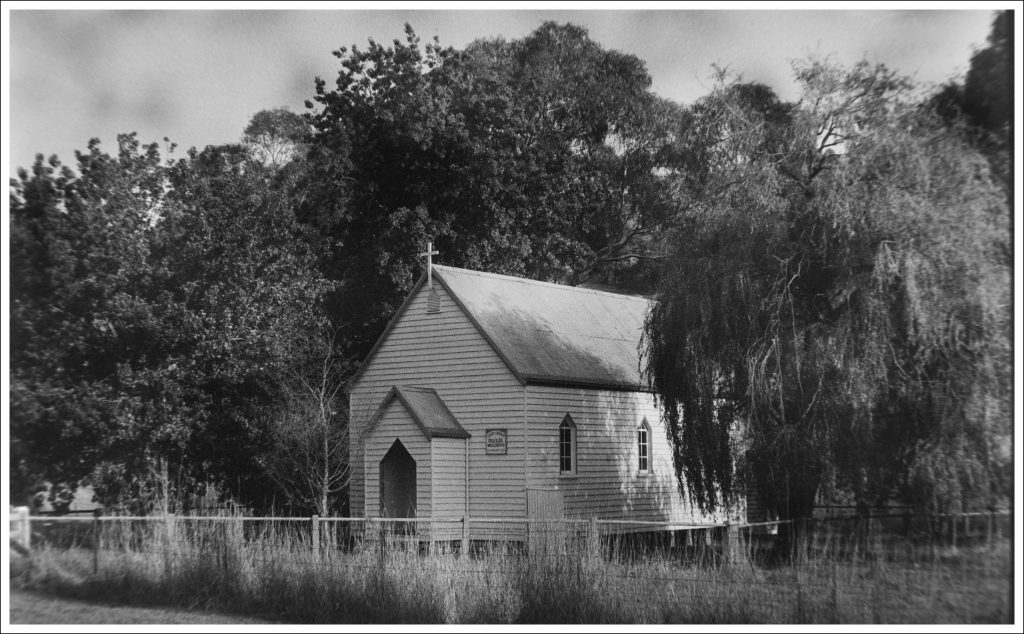
A sample image from the latest scans, this roll was a Kest FP4 roll that is expired film. The date on the bulk film loader was August 1980, this gives the look you see.